
How to View Your Property's Vehicles
Your client portal account lets you see every vehicle registered at your property in real time: licence plates, permit status, and start/end dates. Five steps:
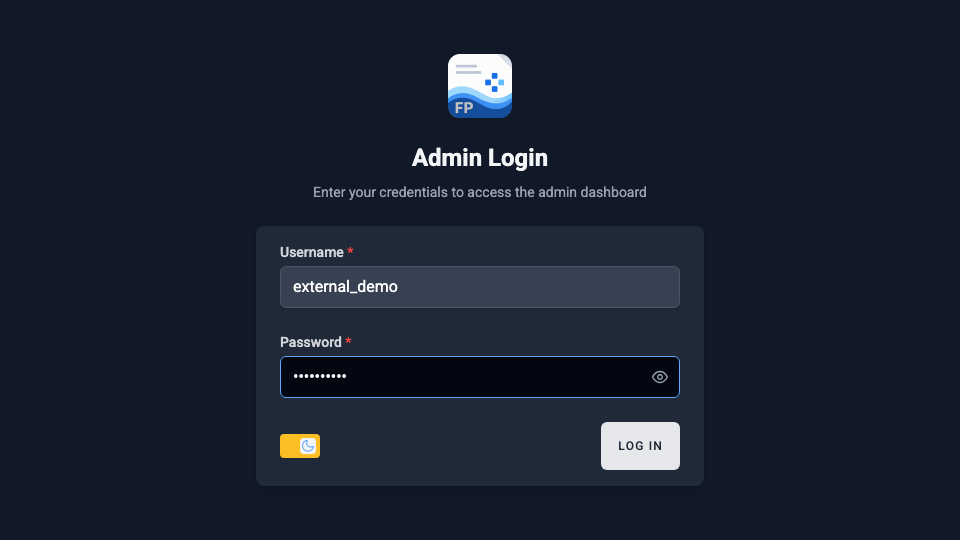
Step 1: Log In
- Go to fieldpad.app/login on any phone or computer.
- Enter the username and password provided to you.
- Click Log In.
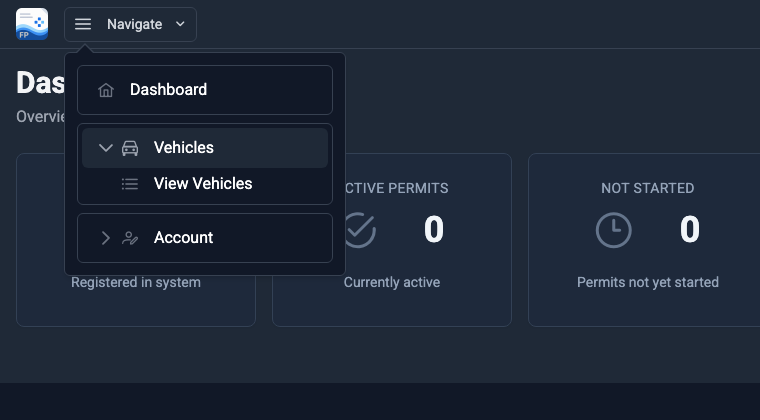
Step 2: Open the Vehicles Menu
Step 3: Review Your Vehicle List
Every registered vehicle appears with its licence plate, permit ID, and start / end dates. The numbered buttons in the screenshot:
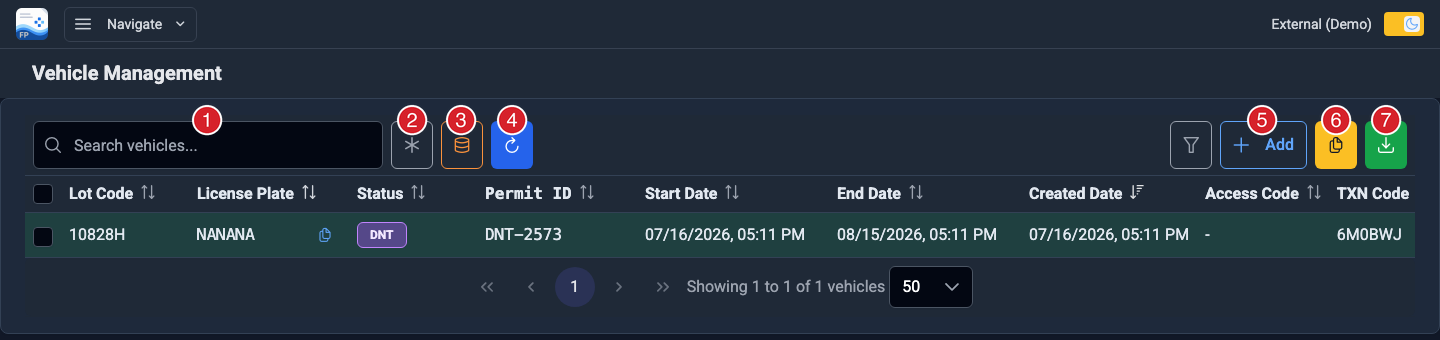
| (1) Search box | Type a licence plate or permit ID to narrow the list. |
| (2) Fuzzy search | Finds a plate even if a character is typed wrong. |
| (3) Search all | Searches the entire database, not just the vehicles loaded on screen. |
| (4) Refresh | Reloads the list with the latest data. |
| (5) Add | Registers a new vehicle. |
| (6) Copy | Copies the selected vehicles to your clipboard. |
| (7) Download | Exports the selected vehicles to a spreadsheet (CSV). |
Step 4: Add a Vehicle
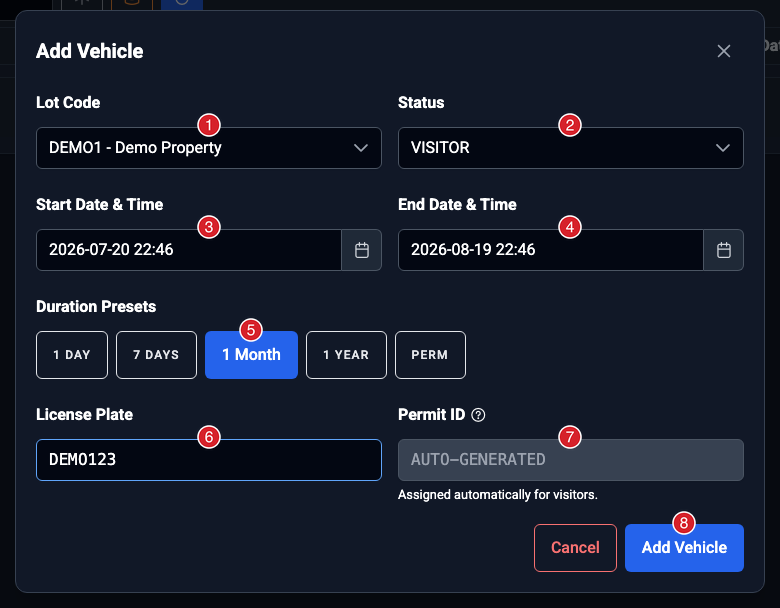
| (1) Lot Code | The property where the vehicle parks. Only your properties appear. |
| (2) Status | Vehicle type: Visitor, Tenant (parked indoor or outdoor), or Employee. |
| (3) Start Date & Time | When the permit begins. Defaults to the current time. |
| (4) End Date & Time | When the permit expires. Set it directly or use a preset. |
| (5) Duration Presets | One click sets the end date: 1 Day, 7 Days, 1 Month, 1 Year, or PERM (10 years). |
| (6) License Plate | The vehicle's plate, letters and numbers only. |
| (7) Permit ID | Auto-generated for visitors. For Tenant or Employee statuses, enter the stall number or identifier here. |
| (8) Add Vehicle | Saves the permit. The vehicle appears in your list right away. |
Step 5: Manage a Vehicle
Each row has action buttons in the Actions column on the far right. Scroll the table sideways if you do not see them.
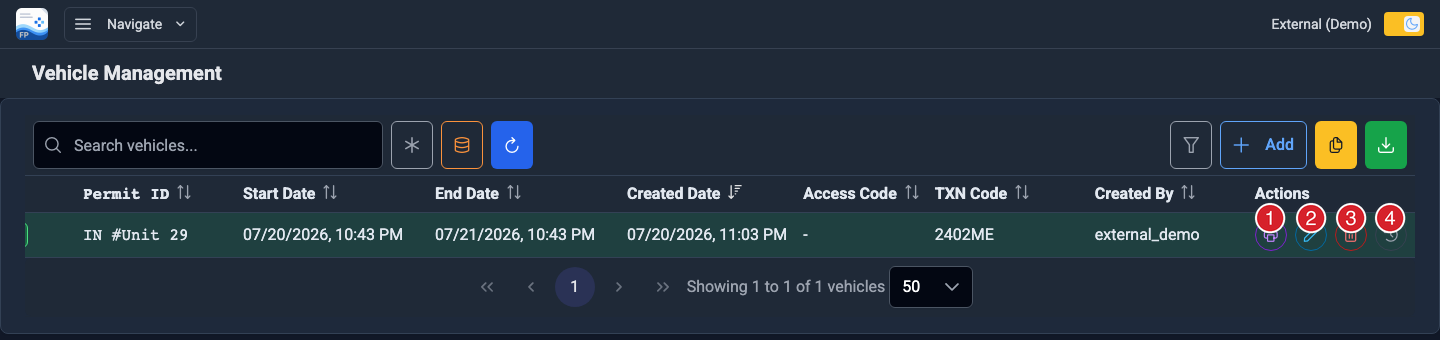
| (1) Print Receipt | Prints the permit receipt. Available once the permit has a transaction code. |
| (2) Edit | Opens the Step 4 form pre-filled. Click Save Changes when done. |
| (3) Delete | Removes the vehicle and its permit. You will be asked to confirm first. |
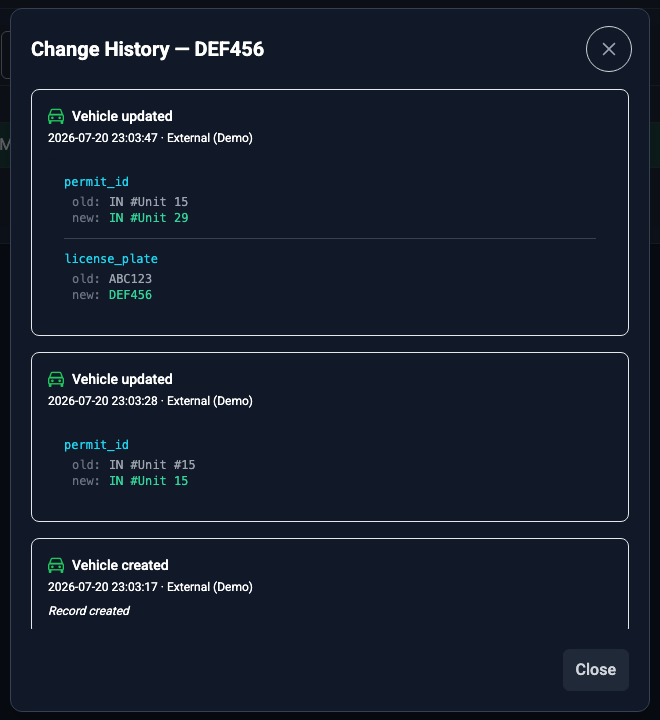
| (4) Change History | Shows every change made to the vehicle. Appears once a vehicle has at least one change. |
Change History lists each change with the field, the old and new values, the date, and who made it:
Questions?If Contactyou have any questions, contact us at 416-779-4545 or info@m6group.ca.